 |
| Dlib detecting the 68 Face Landmarks |
The 68 feature points which the Dlib model detects include the Jawline of the face, left and right eyes, left and right eyebrows, the nose, and the mouth. So, what if you only want to detect few of those features on a face? E.g. you may only want to detect the positions of the eyes and the nose. Is there a way to extract only few of the features from the Dlib shape predictor?
There is actually a very simple way to do that. Here’s how.
Let’s take the same image above, and add a bit of code to annotate the 68 feature points.
Update 5/Apr/17: The code I posted initially gave some errors when trying to run on OpenCV 3 and Python 3+. Thanks Shirish Ranade for pointing it out and sharing the code fix. The code is now updated so that it works on Python 2.7 and 3+ with either OpenCV 2 or 3.
 faceCascade = cv2.CascadeClassifier(cascPath)

 predictor = dlib.shape_predictor(PREDICTOR_PATH)

 # Read the image
 image = cv2.imread(imagePath)
 gray = cv2.cvtColor(image, cv2.COLOR_BGR2GRAY)

 # Detect faces in the image
 faces = faceCascade.detectMultiScale(
   gray,
   scaleFactor=1.05,
   minNeighbors=5,
   minSize=(100, 100),
   flags=cv2.CASCADE_SCALE_IMAGE
 )

 print("Found {0} faces!".format(len(faces)))

 # Draw a rectangle around the faces
 for (x, y, w, h) in faces:
   cv2.rectangle(image, (x, y), (x + w, y + h), (0, 255, 0), 2)

   # Converting the OpenCV rectangle coordinates to Dlib rectangle
   dlib_rect = dlib.rectangle(int(x), int(y), int(x + w), int(y + h))

   landmarks = np.matrix([[p.x, p.y]
               for p in predictor(image, dlib_rect).parts()])

   for idx, point in enumerate(landmarks):
     pos = (point[0, 0], point[0, 1])
     cv2.putText(image, str(idx), pos,
           fontFace=cv2.FONT_HERSHEY_SCRIPT_SIMPLEX,
           fontScale=0.4,
           color=(0, 0, 255))

     cv2.circle(image, pos, 2, color=(0, 255, 255), thickness=-1)

 cv2.imshow("Landmarks found", im)
 cv2.waitKey(0)
We are simply numbering each of the feature points, in the order they come from the shape predictor, from '0' to '67'. The result will look like this.
 |
| The 68 feature points, annotated |
- Points 0 to 16 is the Jawline
- Points 17 to 21 is the Right Eyebrow
- Points 22 to 26 is the Left Eyebrow
- Points 27 to 35 is the Nose
- Points 36 to 41 is the Right Eye
- Points 42 to 47 is the Left Eye
- Points 48 to 60 is Outline of the Mouth
- Points 61 to 67 is the Inner line of the Mouth
So, all we need to do is to slice the array that contains the feature points in order to get the points of the features we want.
Let’s first define the ranges of each of those features,
 JAWLINE_POINTS = list(range(0, 17))
 RIGHT_EYEBROW_POINTS = list(range(17, 22))
 LEFT_EYEBROW_POINTS = list(range(22, 27))
 NOSE_POINTS = list(range(27, 36))
 RIGHT_EYE_POINTS = list(range(36, 42))
 LEFT_EYE_POINTS = list(range(42, 48))
 MOUTH_OUTLINE_POINTS = list(range(48, 61))
 MOUTH_INNER_POINTS = list(range(61, 68))
Now, all we need to do is to slice the array using these ranges.
Let’s say we only need to get the right eye,
 landmarks = np.matrix([[p.x, p.y]
               for p in predictor(image, dlib_rect).parts()])

 landmarks_display = landmarks[RIGHT_EYE_POINTS]

 for idx, point in enumerate(landmarks_display):
     pos = (point[0, 0], point[0, 1])
     cv2.circle(image, pos, 2, color=(0, 255, 255), thickness=-1)
 |
| Getting just the Right Eye |
landmarks_display = landmarks[NOSE_POINTS]
 |
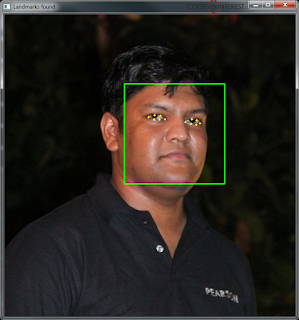
| Just the Nose |
That's also quite simple, you just add it up,
landmarks_display = landmarks[RIGHT_EYE_POINTS + LEFT_EYE_POINTS]
 |
| Getting both Left and Right Eyes |
landmarks_display = landmarks[NOSE_POINTS + MOUTH_OUTLINE_POINTS]
Quite simple right?
You can use this same technique to extract any combination of face feature points from the Dlib Face Landmark Detection.
Here's the full source code to get you started,
 import numpy as np
 import cv2
 import dlib

 imagePath = "path to your image"
 cascPath = "path to your haarcascade_frontalface_default.xml file"

 PREDICTOR_PATH = "path to your shape_predictor_68_face_landmarks.dat file"

 JAWLINE_POINTS = list(range(0, 17))
 RIGHT_EYEBROW_POINTS = list(range(17, 22))
 LEFT_EYEBROW_POINTS = list(range(22, 27))
 NOSE_POINTS = list(range(27, 36))
 RIGHT_EYE_POINTS = list(range(36, 42))
 LEFT_EYE_POINTS = list(range(42, 48))
 MOUTH_OUTLINE_POINTS = list(range(48, 61))
 MOUTH_INNER_POINTS = list(range(61, 68))

 # Create the haar cascade
 faceCascade = cv2.CascadeClassifier(cascPath)

 predictor = dlib.shape_predictor(PREDICTOR_PATH)

 # Read the image
 image = cv2.imread(imagePath)
 gray = cv2.cvtColor(image, cv2.COLOR_BGR2GRAY)

 # Detect faces in the image
 faces = faceCascade.detectMultiScale(
   gray,
   scaleFactor=1.05,
   minNeighbors=5,
   minSize=(100, 100),
   flags=cv2.CASCADE_SCALE_IMAGE
 )

 print("Found {0} faces!".format(len(faces)))

 # Draw a rectangle around the faces
 for (x, y, w, h) in faces:
   cv2.rectangle(image, (x, y), (x + w, y + h), (0, 255, 0), 2)

   # Converting the OpenCV rectangle coordinates to Dlib rectangle
   dlib_rect = dlib.rectangle(int(x), int(y), int(x + w), int(y + h))

   landmarks = np.matrix([[p.x, p.y]
               for p in predictor(image, dlib_rect).parts()])

   landmarks_display = landmarks[RIGHT_EYE_POINTS + LEFT_EYE_POINTS]

   for idx, point in enumerate(landmarks_display):
     pos = (point[0, 0], point[0, 1])
     cv2.circle(image, pos, 2, color=(0, 255, 255), thickness=-1)

 cv2.imshow("Landmarks found", image)
 cv2.waitKey(0)
Related posts:
Getting Dlib Face Landmark Detection working with OpenCV
Related links:
http://www.pyimagesearch.com/2017/04/03/facial-landmarks-dlib-opencv-python/
https://matthewearl.github.io/2015/07/28/switching-eds-with-python/
Build Deeper: Deep Learning Beginners' Guide is the ultimate guide for anyone taking their first step into Deep Learning.
Get your copy now!


hi if i have Cascades file of traffic sign , is it possible to detect with traffic sign same as facial landmark??
ReplyDeleteIf you have a Cascade file for traffic signs, you would be able to use it to detect traffic signs and draw the bounding box of the traffic sign.
DeleteBut to detect specific points within the traffic sign (a.k.a. landmarks) you would need a shape predictor specifically trained for traffic signs. The shape_predictor_68_face_landmarks unfortunately only works for faces.
hi sir if i have dlib library using how to get the human face detect after how to generate dataset.
ReplyDeleteOkay .....is it possible to detect and recognize the traffic signs with dlib??
ReplyDeleteHI, your work is good. I have a question. Can I connect point with each other with lines. It is possible???
ReplyDeletewhere can i get the xml filefrom
ReplyDelete