Few weeks back, we talked about OpenMV - the small embedded computer vision module with a built-in camera, that can be programmed to perform various vision tasks. It gives you the ability to bring computer vision in to your embedded projects.
After I first read about it, I was eager to get my hands on a kit. Their official site - openmv.io - offers international shipping, as well as links to local distributes in some countries. The shipping was quite fast.
 |
| The OpenMV Cam M7 |
First Impressions
The cam comes with a really nice clear plastic case. The headers (used to connect other shields on to the board) comes separate (pictured above). This gives you the option to solder them - or other types of headers - yourself if needed. Headers aren't essential for the basic usage of OpenMV. Both the case and the board itself has an excellent build quality.
The cam itself is smaller than I expected: about 2/3 the size of a credit card.
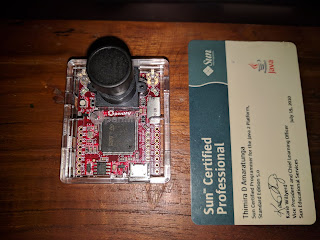 |
| The size of the OpenMV Cam |
The clear plastic casing has cutouts for the micro-USB port (on the bottom), and the micro-SD card slot (on the right side).
 |
| The cutout for the micro-USB port |
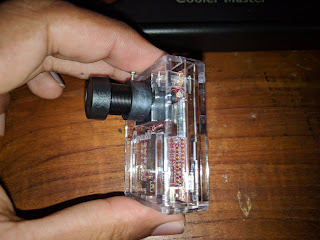 |
| The cutout for the micro-SD card slot |
The cam also comes with a lens cap, to prevent accidental damage to the lens.
 |
| The lens cap |
Software Setup
The first step is to install the OpenMV IDE. You can download it from the official downloads page - https://openmv.io/pages/download. The IDE is available for Windows, Mac OS, Ubuntu, and Raspberry Pi.
 |
| Download the OpenMV IDE for your OS |
The installer for Windows is straight forward. Just run the downloaded installer and follow the installation wizard.
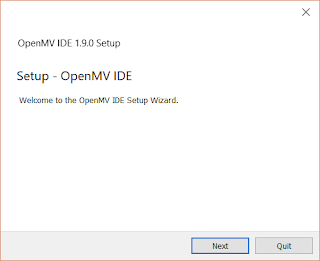 |
| The OpenMV IDE Setup Wizard |
Select 'Install' when it prompts to install the 'OpenMV Cam USB Driver'.
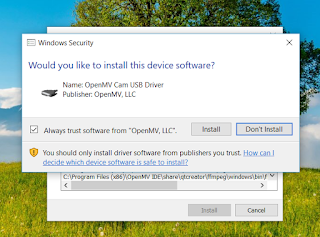 |
| The prompt to install the USB Driver |
Once the installation wizard completes, launch the IDE once to verify.
 |
| The OpenMV IDE |
The setup instructions for Mac OS, Linux, and Raspberry Pi are available here: http://docs.openmv.io/openmvcam/tutorial/software_setup.html
Hardware Setup
Before the OpenMV Cam can be used for the first time, there are a few things you need to do.
As stated in the official guide,
We require you to manually clean your OpenMV Cam camera IC and then focus the lens because it’s very expensive for us to do this currently. As we increase our production volume we’ll be able to do this eventually for you. Note that all OpenMV Cam camera ICs are cleaned before being packaged, but, since focusing is not done our manufacturer can’t tell if the camera IC is clean. The quality control test we use for each OpenMV Cam only verifies that the camera IC is connected properly and operating normally.
In order to clean the camera IC, we first need to open the plastic case.
Use a small flathead screwdriver to pry open the case. It's easier to open the case from the left side.
 |
| Open the case from the left side |
To remove the cam entirely from the case, you may need to remove the small screw at the top of the lens mount.
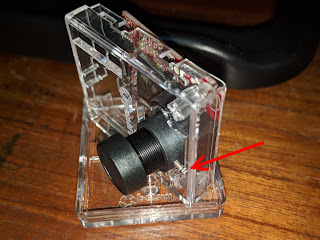 |
| Remove this screw |
The official guide suggests removing the following two screws from the back of the board in order to detach the lens mount entirely from the board.
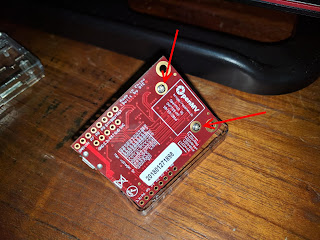 |
| Screws to detach the lens mount |
However, I found that it's easier to clean the camera IC by just unscrewing the focusing barrel of the lens, which exposes the camera IC.
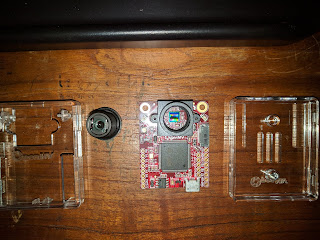 |
| The camera IC exposed after removing the focusing barrel |
Now, just use a cotton swab dipped in a bit of isopropyl alcohol to clean the camera IC. Be careful not to put too much pressure, which might scratch the surface of the IC.
 |
| Clean the IC using a cotton swab |
Wait until all of the isopropyl alcohol has been evaporated, and then put back the parts of the cam together.
Now we're ready to connect Cam to the PC.
Connect, Update, and Focus
Use a micro-USB cable to connect the OpenMV Cam to your PC. When the connection is successful, the blue LED on the OpenMV Cam will start to blink.
 |
| Blue LED blinking on successful USB connection |
On Windows, OpenMV will be detected as a USB Storage Device, with a README file in it.
 |
| OpenMV detected as a USB Storage Device |
Now, launch the OpenMV IDE, and click the 'Connect' button on the lower left side of the UI.
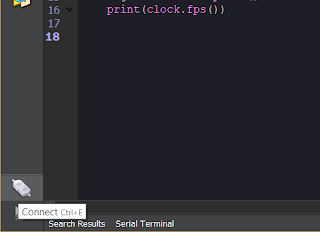 |
| The Connect button |
When connecting, the OpenMV IDE will automatically check the firmware version of the Cam, and would notify if a newer version of firmware is available.
 |
| Firmware update notice |
The IDE will ask for confirmation to erase the data in the Cam, and then update it with the latest firmware.
 |
| Erase confirmation |
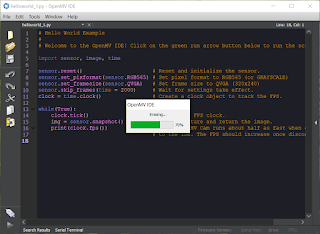 |
| Erasing... |
 |
| Updating the firmware |
The LED on the Cam will turn green during the update process.
 |
| The LED turning green during the update |
Once the updating is complete, a prompt will ask you to click OK after the Cam starts blinking the blue LED again. Wait about a minute until the blue LED is blinking again, and then click OK.
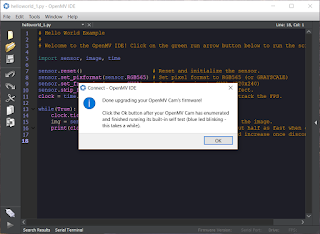 |
| Only click OK after the Cam has started blinking the blue LED |
After the update completes, the taskbar of the IDE will show the firmware version as 'latest'.
 |
| Firmware version shown in the taskbar |
The IDE will have the 'helloworld_1.py' script loaded as default. Now we run it using the start button at the bottom left of the IDE.
 |
| Running the HelloWorld script |
The HelloWorld script will show what the OpenMV Cam sees in the Frame Buffer of the IDE.
Why is the view all black? Oh, I forgot to remove the lens cap.
 |
| Remember to remove the lens cap |
The view would most probably be out of focus. We now need to focus it by turning the focusing barrel of the lens. Turn it until the view in the Frame Buffer becomes clear.
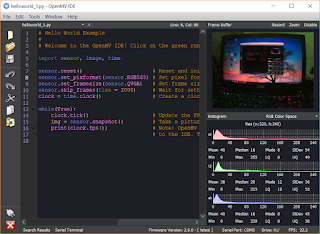 |
| Focus until the Frame Buffer view becomes clear |
Once you have a good focus, you can (gently) tighten the screw on the top of the lens mount to lock in the lens barrel.
 |
| Tighten this screw to lock the focus |
Now your OpenMV Cam is ready for your machine vision tasks.
I will explore how to write and execute scripts on OpenMV in the next tutorials.
Links to OpenMV
- OpenMV Homepage - https://openmv.io/
- OpenMV Products - https://openmv.io/collections/products
- OpenMV IDE - https://openmv.io/pages/download
- OpenMV Official Setup Tutorial - http://docs.openmv.io/openmvcam/tutorial/index.html
Build Deeper: The Path to Deep Learning
Learn the bleeding edge of AI in the most practical way: By getting hands-on with Python, TensorFlow, Keras, and OpenCV. Go a little deeper...
Get your copy now!


Hello,
ReplyDeleteThanks for the tutorial.
Do you have any reference for SDcard library or tutorial?
Hello,
ReplyDeleteCan somebody please help me out with the SD Card issue with an OpenMV CAM M7 module.
I just wanted to store capture images into the SD Card using OpenMV CAM M7 module which I am unable to do so.
Don't know where is the problem.
Default example says please insert SD Card before using it and I do so but somehow the application is not able to detect SD card module.
I am running MJPEG.py example.
Also, I wanted to know that, is there any setting on board to detect SD card using OpenMV CAM M7 module. Please confirm it and revert back to me ASAP.
Guys, Please do let me know because my project is stopped due to this road block.
Your help will be highly appreciated.
Regards,
Ronak
when did you expect next tutorial for openmv?
ReplyDelete